I recently had the need to create a self-signed certificate for one of our web applications wherein the browser does not display a warning message indicating Your connection is not private with the error NET::ERR_CERT_AUTHORITY_INVALID. It was necessary to create certificates for several domains, such as www.subdomain.example.com and www.myblog.sample.com.
A self-signed SSL/TLS certificate must be an X.509 version 3 multidomain SAN certificate and requires a root certificate.
A single certificate can be created for both domains using Subject Alternative Name (SAN).
Let’s go over the steps for creating the certificates using openssl utility.
Root certificate
The first step is to create a private key and a root certificate.
Create a private key
Private key can be created by running the below command
openssl genrsa -des3 -out rootCA.key 2048
This generates a 2048-bit key. The -des3 option instructs the program to encrypt the key using the Tripple DES algorithm, and it will ask for a password before the key file is generated.
Create Root certificate
openssl req -x509 -new -nodes -key rootCA.key -sha256 -days 1024 -out rootCA.pem
You will be prompted for some details when you run the command.
Country Name (2 letter code) [AU]:IN
State or Province Name (full name) [Some-State]:Delhi
Locality Name (eg, city) []:Delhi
Organization Name (eg, company) [Internet Widgits Pty Ltd]:example Website
Organizational Unit Name (eg, section) []:IT
Common Name (e.g. server FQDN or YOUR name) []:Example ROOT CA
Email Address []:[email protected]
Now, we have created a private key rootCA.key and a root certificate rootCA.pem. Let’s create a SSL certificate.
SSL Certificate
The following step is to construct a V3 extension file with SAN-related metadata, a certificate signing request, and an SSL certificate.
create a file named v3.ext and add the below information
authorityKeyIdentifier=keyid,issuer
basicConstraints=CA:FALSE
keyUsage = digitalSignature, nonRepudiation, keyEncipherment, dataEncipherment
subjectAltName = @alt_names
[alt_names]
DNS.1 = *.example.com
DNS.2 = *.sample.com
The alt_names section deserves the attention. This is where you can specify the domains for which the certificate is valid.
Create private key for the SSL and a certificate signing request
openssl req -new -nodes -out server.csr -newkey rsa:2048 -keyout server.key
You will be prompted for some details when you run the command.
Country Name (2 letter code) [AU]:IN
State or Province Name (full name) [Some-State]:Delhi
Locality Name (eg, city) []:Delhi
Organization Name (eg, company) [Internet Widgits Pty Ltd]:example Website
Organizational Unit Name (eg, section) []:IT
Common Name (e.g. server FQDN or YOUR name) []:EXAMPLE DEV CERTIFICATE
Email Address []:[email protected]
A challenge password []:strongpassword
An optional company name []:Example Ltd
This generates server.csr and server.key files.
Issue the certificate with the previously generated root certificate
openssl x509 -req -in server.csr -CA rootCA.pem -CAkey rootCA.key -CAcreateserial -out server.crt -days 500 -sha256 -extfile v3.ext
Using the preceding instructions, we created a server.key and a server.crt.
This must be concatenated into a single file before being imported into the Windows certificate store. Lets create a concatenated file called server.pfx.
openssl pkcs12 -inkey server.key -in server.crt -export -out server.pfx
When you run the command, it will prompt you for an export password, which you will need again when you import the resulting server.pfx.
We now have a self-signed SSL certificate and a Root CA certificate. Let’s look at how to add it to the Windows certificate store.
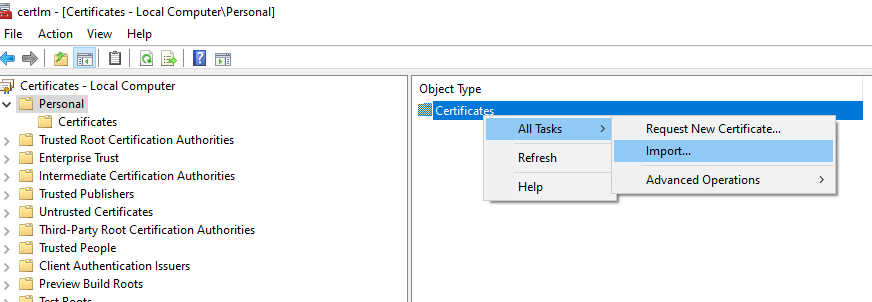
Importing certificates to Windows certificate store
Search for Manage computer certificates in windows 10 start menu and Import server.pfx and rootCA.pem into personal certificates.
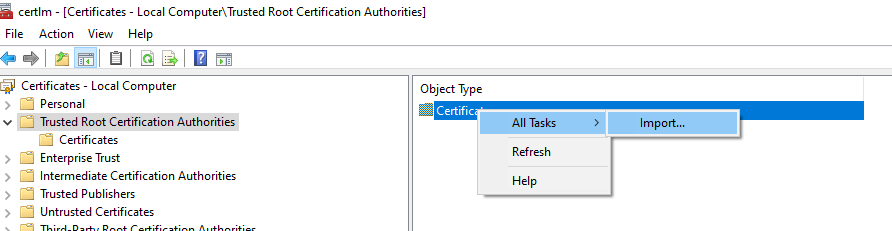
Import the rootCA.pem into Trusted Root Certification Authorities
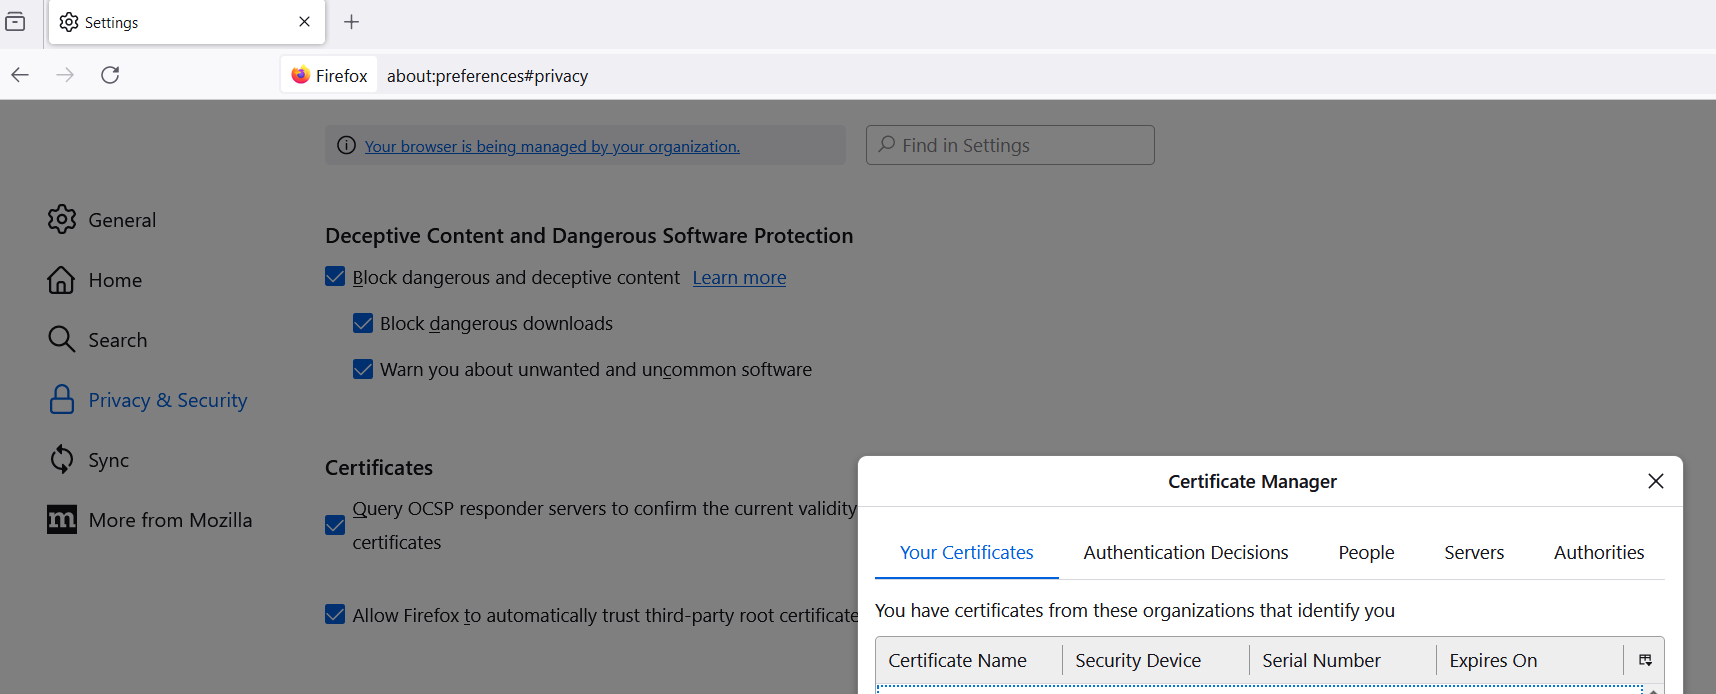
Instead of using the operating system’s certificate store, Firefox browser provides its own certificate store.
References